Creating RESTful Web-Service Backed by a SQL Database Using X2 Framework for Node.js
This is a tutorial that shows how to develop a simple server-side application that provides a RESTful API to access data stored in a SQL database using X2 Framework for Node.js (or simply x2node).
The fully developed example project can be found in at https://github.com/boylesoftware/x2node-tutorial/tree/master/example.
Table of Contents
- Introduction
- Preparation
- The Database
- Project Setup
- Making Service Calls
- Tightening the Screws
- Custom Validation
- New Record Field Uniqueness
- Updated Record Field Uniqueness
- Record Normalization
- Referred Records Existence
- Preventing Referred Records Deletion
- Backend Field Value Calculation
- Backend Operations
- Disabling Certain Methods
- Conditional Requests
- Authentication and Authorization
- User Login
Introduction
X2 Framework for Node.js, or x2node (we call it "times two node", but we won't get offended if you say "eks to node"), is a framework comprised of several related but standalone modules that may be helpful with solving a wide range of Node.js server-side application development tasks. However, originally the framework's main purpose was and remains to provide everything you need to develop a web-service that exposes a RESTful API and is backed with a SQL database. This is the type of application, with which x2node is the most helpful.
In this tutorial we are going to develop a simplified web-service for an online store that provides a catalog of products and allows registred shoppers to place orders. We are going to be focusing only on the server-side but we will assume that there is a front-end web-application that provides the UI for the online store and is the main client of the web-service API.
This tutorial is a good way to get an introduction of the most essential features and modules of the framework, but it does not replace documentation for the individual framework modules, which provides the most in-depth information including all the advanced features that may be left out here. Every framework module has a manual published as README.md file in the module's repository at GitHub. We also have an auto-generated complete API reference.
Preparation
Before we begin the development, let's specify our web-service.
Record Types
First, let's identify with what data objects our application is going to be working. These data objects are going to be stored in our database and the web-service API will be providing access to them. In the x2node world, these objects are called records and their shape is defined by their corresponding record types.
Our application is going to be working with the following major record types:
- Product - This is a descriptor of a product available in our online store. Every product will have a name, a description, a price and an availability flag.
- Account - This is an account of a registered customer. It will include the person's name, E-mail address, information used to authenticate (login) the customer.
- Order - This is an order placed by a customer for a number of products. The record will include information about when the order was placed, what customer placed the order, the order status ("new", "shipped" or "canceled"), order payment transaction ID in a 3rd-party payments processing backend and the order line items, each of which will include the ordered product and the ordered quantity. Once submitted, the order details may not be changed with the exception of its status.
Actors
Now, let's identify types of users that are going to be calling our API. In the x2node world, entities that call the API are called actors.
Our application will be serving two types of actors:
- Customer - The online store customers. A customer can manage his or her own account and place orders.
- Admin - The store administrator, who will have access to the complete API and will be able to perform all operations such as manage the product catalog, customer accounts and orders.
We will also have unauthenticated calls. For example, searching the product catalog will not require a logged in user and will be available to the public.
API Endpoints
There is a certain approach to the API endpoints design that x2node suggests. Instead of identifying very specific API use-cases dictated by the API client (e.g. the UI web-application) and creating narrowly specific endpoints for each of those use-cases, we create general purpose API endpoints for the basic CRUD operations for each record type our web-service is going to expose. After that, we can customize those endpoints by either limiting or extending their functionality and create any additional endpoint for the specific use-cases not covered by the generic endpoints. This approach allows us to have a completely functional back-end API developed before the client application(s) are settled. Having that in mind, let's see what endpoints our API is going to have.
First, let's define the most essential API for our actors. This API will provide full access to the online store data and allow searching, reading, creating, updating and deleting records of every supported record type given the actor role sufficient for the operation. Here it goes:
| URI | Method | Required Role | Description |
|---|---|---|---|
| /products | GET |
Everybody | This call will allow searching the products catalog. The search parameters, together with result sorting, product data included in the response and any result pagination requirements will be included in the API request as URL parameters. The call is allowed to everybody, including unauthenticated users. |
| /products | POST |
Admin | This will be used by the store admins to create new products. The product data will be included in the call HTTP request body. |
| /products/{productId} | GET |
Everybody | This call will allow getting information about the specific product identified by the product ID in the call URI. All available product information will be included in the HTTP response body. The call is allowed to everybody, including unauthenticated users. |
| /products/{productId} | PATCH |
Admin | This call will be used by the store admins to update product information. The specific product is identified by the ID in the call URI. The product data patch specification will be included in the call HTTP request body. |
| /products/{productId} | DELETE |
Admin | This will allow store admins to completely erase the product from the catalog. The product is identified by the ID in the call URI. Deletion of a product will not be allowed if orders exist for it (product availability flag can be used to hide the product from the catalog in that case). |
| /accounts | GET |
Admin | Will allow store admins to search the customer accounts. As with the /products endpoint, the search parameters will be specified in the request URL parameters. Only admins will be allowed to list/search customer accounts. |
| /accounts | POST |
Everybody | This call will be used to create new customer accounts. For the purpose of this tutorial, this is a very simple call allowed to everybody, so everybody can registered. A real-life online store would probably have a more complex logic including account confirmation. |
| /accounts/{accountId} | GET |
Admin, Customer | Get customer account information. The customer is identified by the account ID in the URI. Admins can request information about any existing customer. A customer can request information only about him or herself (the ID in the URI must match the authenticated user ID). |
| /accounts/{accountId} | PATCH |
Admin, Customer | Update customer account information. Admins can update any account, customers can update only their own accounts. |
| /accounts/{accountId} | DELETE |
Admin, Customer | Permanently delete customer account. Admins can delete any account, customers can delete only their own accounts. Accounts are allowed to be deleted only if they don't have any orders. |
| /orders | GET |
Admin | List/search orders. |
| /orders | POST |
Admin | Create an order. Creating an order also triggers a payment authorization in the payments processing backend. The order data submitted with the POST, in addition to the regular Order record fields, includes information for the payment (credit card number, etc.), which are not stored in the database but are used to authorize the payment. Once an order is created and the payment is authorized, the order record cannot be deleted. |
| /orders/{orderId} | GET |
Admin | Get order information. |
| /orders/{orderId} | PATCH |
Admin | Update order. The only property of the order that can be updated is its status. Changing the status triggers corresponding operations in the payments processing backend: the payment transaction can be captured if the order has been shipped or voided if the order was canceled. |
As you can see, there is the same set of endpoints for each record type in our system: we have an enpoint that addresses all records of the given type and allows GET and POST HTTP methods, and we have an endpoint that addresses a specific record of the given type identified by the record ID included in the URI and allows GET, PATCH and DELETE methods (DELETE method is not allowed for the Order records as an exception). The first endpoint type is called record collection endpoint and the second type is called individual record endpoint. That way, our web-service API represents the records of different record types as resources in the true RESTful API spirit.
You may notice that the Order resource API is open only to the store admins. But how do customers manage their own orders? We could allow role Customer access the Order resource endpoints, but then we would have to implement some tricky logic in the back-end that would limit their access only to their own orders (we don't want them to see or do anything to other customers' orders). Instead, we can introduce endpoints for sub-resources under the /accounts/{accountId} URI like this:
| URI | Method | Description |
|---|---|---|
| /accounts/{accountId}/orders | GET |
List/search orders of the specific customer. |
| /accounts/{accountId}/orders | POST |
Create new order for the customer. |
| /accounts/{accountId}/orders/{orderId} | GET |
Get one of the customer's orders. |
| /accounts/{accountId}/orders/{orderId} | PATCH |
Update one of the customer's orders. |
The /orders endpoints will be used by the store administrative application and present the Order as a system-wide resource. The /accounts/{accountId}/orders endpoints will be used by the end-user application and present the Order as a sub-resource of the Account resource.
We will also need a special, non-resource endpoint to allow our users to login:
| URI | Method | Description |
|---|---|---|
| /login | POST |
Authenticate a user, which may be the store admin or a customer. The username and the password will be provided in a JSON object in the request body. The response will include an authentication token that can be used with subsequent API calls. |
Not every web-service handles initial user authentication (the user login) itself. These days standards like OAuth 2.0 allow delegation of the authentication token issuing to a thrid-party. The web-service then merely verifies the authentication tokens it receives with the calls and matches them against its own user database. For the purpose of our tutorial, however, we are going to the our web-service handle user logins on its own.
The Database
There is a long standing tradition in developing database-driven server-side applications to start with the database design. Let's honor this tradition and define our schema. For this tutorial we'll use MySQL (the framework's SQL database access module also supports PostgreSQL and will support other databases in the near future).
Given our record types, the schema is straightforward:
CREATE TABLE products (
    id INTEGER UNSIGNED AUTO_INCREMENT PRIMARY KEY,
    name VARCHAR(50) NOT NULL,
    description TEXT,
    price NUMERIC(5,2) NOT NULL,
    is_available BOOLEAN NOT NULL
);

CREATE TABLE accounts (
    id INTEGER UNSIGNED AUTO_INCREMENT PRIMARY KEY,
    email VARCHAR(60) NOT NULL UNIQUE, -- used as login name
    fname VARCHAR(30) NOT NULL,
    lname VARCHAR(30) NOT NULL,
    pwd_digest CHAR(40) NOT NULL -- password SHA digest in hex encoding
);

CREATE TABLE orders (
    id INTEGER UNSIGNED AUTO_INCREMENT PRIMARY KEY,
    account_id INTEGER UNSIGNED NOT NULL,
    placed_on CHAR(10) NOT NULL, -- in YYYY-MM-DD format
    status ENUM('NEW', 'SHIPPED', 'CANCELED') NOT NULL,
    payment_txid VARCHAR(100) NOT NULL, -- payments backend transaction id
    FOREIGN KEY (account_id) REFERENCES accounts (id)
);

CREATE TABLE order_items (
    id INTEGER UNSIGNED AUTO_INCREMENT PRIMARY KEY, -- explained below
    order_id INTEGER UNSIGNED NOT NULL,
    product_id INTEGER UNSIGNED NOT NULL,
    qty TINYINT UNSIGNED NOT NULL,
    FOREIGN KEY (order_id) REFERENCES orders (id),
    FOREIGN KEY (product_id) REFERENCES products (id),
    UNIQUE (order_id, product_id)
);
You may notice that we added a synthetic primary key to the order items table, which is technically not needed for a fully normalized schema. The framework, however, requires it—it needs it to be able to detect changes in complex list elements such as the order items.
At the moment, the framework does not have a module that generates database schema for you automatically. We may develop such module in some future, but in any case, we recommend maintaining the database schema as a separate piece of your project. Yes, it introduces a task of maintaining your data sotrage definition in sync in two separate places—the database and your application—but it also gives you full control over the data storage intricacies (think indexes, tablespaces, collations, etc.). Your DBAs will thank you!
So, go ahead, fire up your MariaDB, create a database, create a database user for your application and initialize the schema with the above DDL. Something like this:
$ mysql -uroot -p
...

MariaDB [(none)]> create database x2tutorial character set 'utf8';
Query OK, 1 row affected (0.00 sec)

MariaDB [(none)]> grant all on x2tutorial.* to 'x2tutorial'@'localhost' identified by 'x2tutorial';
Query OK, 0 rows affected (0.00 sec)

MariaDB [(none)]> exit
Bye

$ mysql -ux2tutorial -px2tutorial x2tutorial < create-schema-mysql.sql
Project Setup
x2node modules are published in NPM, so let's setup our project using it. Let's create a directory called x2tutorial for our project and in it create our intial package.json file:
{
  "name": "x2tutorial",
  "private": true
}
We can also save our database schema creation script along with the project under, say, misc/schema/create-schema-mysql.sql. So that we have:
x2tutorial/
+--misc/
|  +--schema/
|     +--create-schema-mysql.sql
+--package.json
Now we can add modules that our project is going to use. We will need the records module for our record types library (this is one of the most foundational modules of the framework that implements the concept of the records):
$ npm install --save x2node-records
We will need the DBOs (Database Operations) module to access our database:
$ npm install --save x2node-dbos
We will also need the database driver module:
$ npm install --save mysql
Now, we will need the web-services module for the basic RESTful API functionality:
$ npm install --save x2node-ws
And we will need an advanced RESTful API resources module that will make our lives much easier:
$ npm install --save x2node-ws-resources
And finally, we will want to keep our runtime environment information, such as the database connection information, in a .env file, so let's add the dotenv module:
$ npm install --save dotenv
And create the .env file in our project directory:
#
# Port, on which our web-service will be listening.
#
HTTP_PORT=3001

#
# Database connection information.
#
DB_HOST=localhost
DB_NAME=x2tutorial
DB_USER=x2tutorial
DB_PASSWORD=x2tutorial
At this point, our project structure should look like this:
x2tutorial/
+--misc/
|  +--schema/
|     +--create-schema-mysql.sql
+--node_modules/
|  +--...
+--.env
+--package-lock.json
+--package.json
And we are ready to start the development.
Record Type Definitions
We started our project with the database schema definition. Now, let's define our record types for the application and map them to the tables and columns in the database.
For our application our records are going to be represented by JSON objects and that's what our exposed API will be operating with as well. Each record type will need a record type definition that describes the shape of the record object, maps object properties to the database, establishes record relations, adds property value validation rules, etc. All of the application record type definitions together are assembled into the record types library, which is an object provided by the x2node framework to the rest of the application and represents the application's data domain description. Other framework modules as well as the application's custom code use the record types library object to query the record types meta-data.
Let's create a separate file under lib/record-type-defs.js where we are going to keep our record type definitions so that have all data structure related stuff in a single place:
'use strict';

exports.recordTypes = {
    'Product': {
        table: 'products',
        properties: {
            'id': {
                valueType: 'number',
                role: 'id'
            },
            'name': {
                valueType: 'string',
                validators: [ ['maxLength', 50] ]
            },
            'description': {
                valueType: 'string',
                optional: true
            },
            'price': {
                valueType: 'number',
                validators: [ ['precision', 2], ['range', 0.00, 999.99] ]
            },
            'available': {
                valueType: 'boolean',
                column: 'is_available'
            }
        }
    },
    'Account': {
        table: 'accounts',
        properties: {
            'id': {
                valueType: 'number',
                role: 'id'
            },
            'email': {
                valueType: 'string',
                validators: [ ['maxLength', 60], 'email', 'lowercase' ]
            },
            'firstName': {
                valueType: 'string',
                column: 'fname',
                validators: [ ['maxLength', 30] ]
            },
            'lastName': {
                valueType: 'string',
                column: 'lname',
                validators: [ ['maxLength', 30] ]
            },
            'passwordDigest': {
                valueType: 'string',
                column: 'pwd_digest',
                validators: [ ['pattern', /^[0-9a-f]{40}$/] ]
            }
        }
    },
    'Order': {
        table: 'orders',
        properties: {
            'id': {
                valueType: 'number',
                role: 'id'
            },
            'accountRef': {
                valueType: 'ref(Account)',
                column: 'account_id',
                modifiable: false
            },
            'placedOn': {
                valueType: 'string',
                column: 'placed_on',
                validators: [ 'date' ],
                modifiable: false
            },
            'status': {
                valueType: 'string',
                validators: [ ['oneOf', 'NEW', 'SHIPPED', 'CANCELED'] ]
            },
            'paymentTransactionId': {
                valueType: 'string',
                column: 'payment_txid',
                validators: [ ['maxLength', 100] ],
                modifiable: false
            },
            'items': {
                valueType: 'object[]',
                optional: false,
                table: 'order_items',
                parentIdColumn: 'order_id',
                modifiable: false,
                properties: {
                    'id': {
                        valueType: 'number',
                        role: 'id'
                    },
                    'productRef': {
                        valueType: 'ref(Product)',
                        column: 'product_id'
                    },
                    'quantity': {
                        valueType: 'number',
                        column: 'qty',
                        validators: [ 'integer', ['range', 1, 255] ]
                    }
                }
            }
        }
    }
};
The above definitions should be in large part self-explanatory. The framework module that will be working with these definitions—the module that provides the record types library—is x2node-records. See its manual for the record type definitions basics. We also utilize some extended definition attributes such as validators attribute provided by the x2node-validators module, and table and column attributes provided by the x2node-dbos module.
If you don't feel like reading the full documentation for those modules right at this moment, which is totally understandable, a few explanatory notes about the above:
At the top of the
recordTypesobject we have record type definitions by record type name (Product, Account and Order). The properties of each record are defined by thepropertiesobject. The keys in thepropertiesobject are property names as they appear in the record JSON.The mandatory
valueTypeproperty definition attribute defines the type of the property as it appears in the record JSON. The valid types include the valid JSON types:string,number,booleanandobject(for nested object property). To make a property a JSON array, the value type is appended with[](so Order record'sitemsproperty isobject[], which means it's an array of nested objects).A special
valueTypeis used for properties that are references to records of other record types. The syntax isref(TargetRecordTypeName). See such properties asaccountRefin the Order record type andproductRefin the Order's nesteditemsobject. The references in x2node records JSON are represented with strings that include the target record type name and the target record id separated with a hash (e.g. Order#25, Product#3). Also, the convention is to name reference properties with a "Ref" suffix (not enforced, just a suggestion!).Attribute
role: 'id'marks the record ID property. It is also used to mark the ID property in nested object arrays.Scalar properties (not arrays) are by default required in records. To mark an optional record property
optional: trueattribute is used.Non-scalar properties, such
itemsin the Order record type, by default are optional. Our Order record must have at least one line item for the order to make sense, so we implicitely marks theitemsproperty asoptional: false.Record type definition attribute
tableis used to map the record type to the database table. If unspecified, the table is assumed to have the same name as the record type.Property definition
columnattribute is used to map the property to the corresponding database column. By default, the column is assumed to have the same name as the property, so we use thecolumnattribute only where it is not so.Property definition attribute
validatorsprovides an array of constraints for the property values. In this example we only use built-in validators provided by the framework. See Standard Validators section of the x2node-validators module's manual for the complete standard validators list. Some validators are applied by the framework automatically. For example, if a property value type is declared to be anumberand the client submits a record with a string via the API, the framework will reject such record.Some validators are so called normalizers. They may modify the property value in some situations. See
lowercasenormalizer in the validators list of theemailproperty on the Account record type. When, for example, a new account record submitted via aPOSTto our application's /accounts endpoint includesemailproperty that contains uppercase letters, the framework will transform it to all lowercase before saving the account record to the database.If a property is marked with a
modifiable: falseattribute, after a new record is created, the property value may not be changed via an update. If a nested object property is marked asmodifiable: false(seeitemsin the Order record type), all of its nested properties are assumed to be unmodifiable as well.Nested object properties have their own nested
propertiesdefinition attribute. If the property is an array, it has its owntableattribute to map the values to the table. A mandatoryparentIdColumnattribute links the table to the parent table. A property withrole: 'id'is required in the nested object array.The record type definitions are designed to be saveable as JSON. Keep that in mind as an option.
The Web Service
Now that we have our database and our record type definitions, we are ready to create the first version of our web-service. Let's create our top server.js file and place it in the project directory:
'use strict';

// load runtime environment configuration
require('dotenv').load();

// create database connections pool
const pool = require('mysql').createPool({
    connectionLimit: 5,
    host: process.env['DB_HOST'],
    port: process.env['DB_PORT'] || 3306,
    database: process.env['DB_NAME'],
    user: process.env['DB_USER'],
    password: process.env['DB_PASSWORD']
});

// load framework modules
const records = require('x2node-records');
const dbos = require('x2node-dbos');
const ws = require('x2node-ws');
const resources = require('x2node-ws-resources');

// build record types library (don't forget the DBOs extension)
const recordTypes = records.with(dbos).buildLibrary(
    require('./lib/record-type-defs.js'));

// create DBO factory for our record types library, MySQL flavor
const dboFactory = dbos.createDBOFactory(recordTypes, 'mysql');

// wrap the database connections pool with a generic interface for the framework
const ds = dboFactory.adaptDataSource(pool);

// create resource endpoint handlers factory and pass our DBO factory to it
const handlers = resources.createResourceHandlersFactory(ds, dboFactory);

// assemble and run the web-service
ws.createApplication()

    // graceful shutdown, close the database connections pool
    .on('shutdown', () => {
        pool.end();
    })

    // add API endpoints
    .addEndpoint(
        '/products',
        handlers.collectionResource('Product'))
    .addEndpoint(
        '/products/([1-9][0-9]*)',
        handlers.individualResource('Product'))
    .addEndpoint(
        '/accounts',
        handlers.collectionResource('Account'))
    .addEndpoint(
        '/accounts/([1-9][0-9]*)',
        handlers.individualResource('Account'))
    .addEndpoint(
        '/orders',
        handlers.collectionResource('Order'))
    .addEndpoint(
        '/orders/([1-9][0-9]*)',
        handlers.individualResource('Order'))
    .addEndpoint(
        '/accounts/([1-9][0-9]*)/orders',
        handlers.collectionResource('accountRef<-Order'))
    .addEndpoint(
        '/accounts/([1-9][0-9]*)/orders/([1-9][0-9]*)',
        handlers.individualResource('accountRef<-Order'))

    // run the service
    .run(Number(process.env['HTTP_PORT']));
As with the record type definitions, nothing replaces reading the manuals of the modules we used in the server.js. The two new modules are x2node-ws and x2node-ws-resources. But if you want to go ahead quick, here are some notes about the code in server.js:
Our record type definitions are processed by the x2node-records module, which builds the record types library object (called
recordTypesin the code) from it. The record type definitions are extendable, so different modules can add their own specific definition attributes. In our definitions we use such attributes astableandcolumnto map the record types to the database tables and columns. These attributes are consumed by the Database Operations (DBOs) module. The x2node-dbos module itself acts as a record types library extension and must be added to the library builder before passing the definitions to it. That takes place in therecords.with(dbos)line.The central piece of the DBOs module is the DBOs Factory. A single factory object is maintained throughout the application lifecycle and is used to build and execute database operations. Creating the factory involves providing the DBOs module with the record types library and the database flavor (the factory will be building SQL queries, which are sometimes rather complex, so it needs to know the underlying RDBMS implementation peculiarities).
We use the 3rd party low-level
mysqlmodule to create the database connections pool. To standardize the connections handling for the framework (and the application, if it needs it), the DBOs module can wrap the pool and create a data source from it with a standard interface. SeedboFactory.adaptDataSource(pool)line in the web-service code.The x2node-ws module's
createApplication()method is used to build the web-service and subsequently run it. ItsaddEndpoint()method is used to define our RESTful API endpoints. The method takes two arguments: the regular expression for the endpoint URI and the endpoint handler implementation, which is normally as custom application component where all the API call handling logic takes place. The endpoint URI regular expression is applied to the whole URI (no^and$are needed) and can contain capturing groups. The capturing groups define so called positional URI parameters that are made available to the handler. We use them in the individual resource endpoints to provide handlers with the record ID from the endpoint URI.The high level x2node-ws-resources module implements the logic for handling resources (API endpoints that represent persistent records and allow the search, create, read, update and delete operations). The module provides an endpoint handler factory called
handlersin our code. The factory builds two types of endpoint handlers: the collection resource, which allows search (HTTP methodGET) and record creation (HTTP methodPOST) operations, and the individual resource, which allows reading a single record (HTTPGETmethod), updating it (HTTPPATCHmethod) and deleting it (HTTPDELETEmethod).In the most basic form, all the handler factory needs is the handled record type name. All the magic happens in the default handler implementation. As are going to see later in this tutorial, the default handlers are usually extended with the custom application code.
The default handlers support sub-resources via the syntax that involves the
<-constructs. It uses the record fields that point to the parent records to construct the records dependency chain.
By now, we should have the following project directory structure:
x2tutorial/
+--lib/
|  +--record-type-defs.js
+--misc/
|  +--schema/
|     +--create-schema-mysql.sql
+--node_modules/
|  +--...
+--.env
+--package-lock.json
+--package.json
+--server.js
And we are ready to run our web-service!
Making Service Calls
We can start our web-service by running NPM in the project directory:
$ npm start
Or, to get some interesting stuff in the output:
$ NODE_ENV=development NODE_DEBUG=X2_APP,X2_DBO npm start --silent
And we can see if the service works with either curl:
$ curl -v http://localhost:3001/products | python -mjson.tool
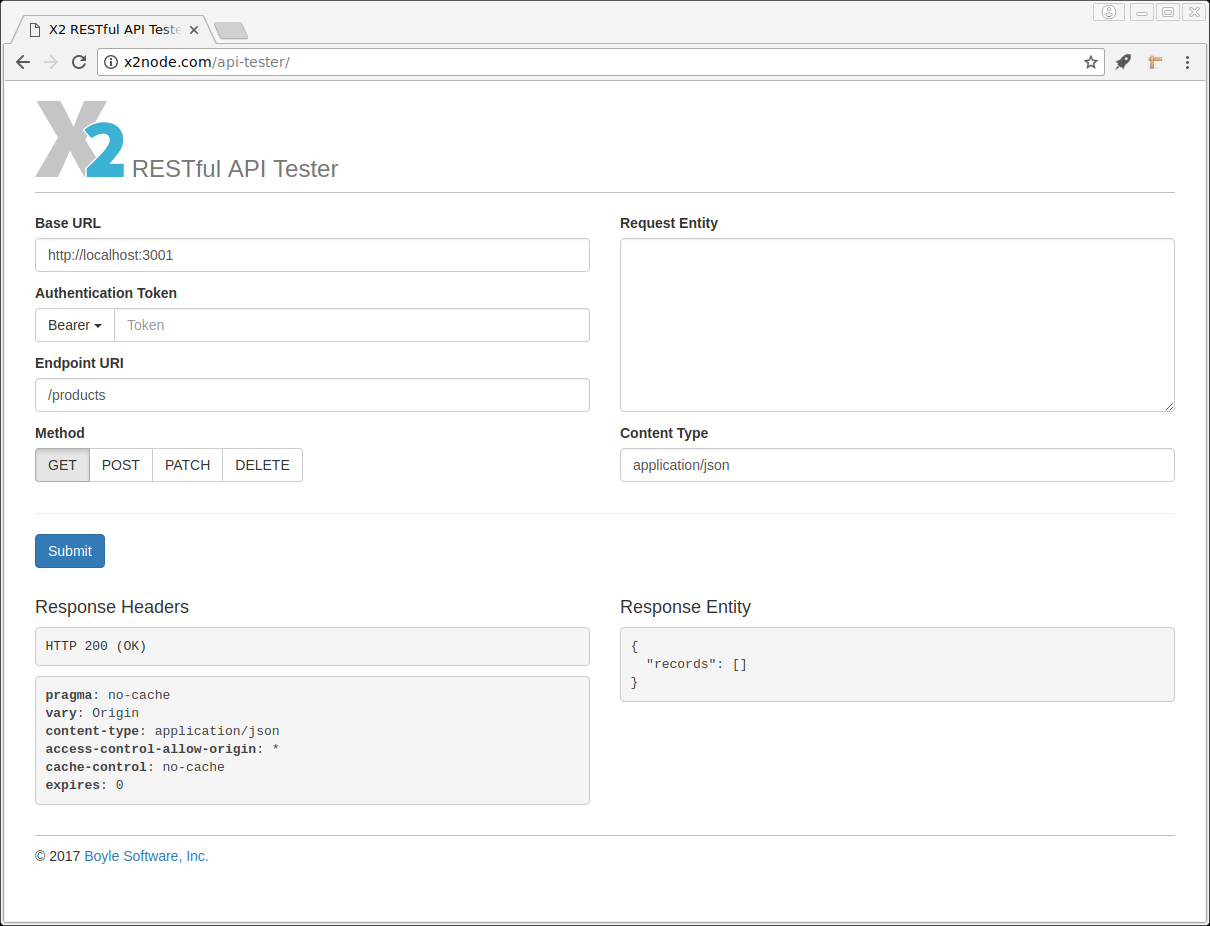
Or use our simple API tester in a browser at http://x2node.com/api-tester/:
Important: We are going to be actively modifying our application code throughout the tutorial. Whenever we do that, the application needs to be restarted. To stop the application you can simply send Ctrl+C to the console window. If you use the API Tester, the browser is going to keep the HTTP connections it makes to our web-service open for a while ("keep-alive" performance optimization). Our web-service will not exit until all those connections are closed, so watch the messages in the console window and give the process some time to wait for all the connections to close. Naturally, curl does not have that problem.
So, let's make some API calls now. In the call examples below we are going to use curl, but it may be more convenient with the API tester—whichever is your preference.
First, let's create a new Product record. To do that, we are going to send a new record template JSON in a POST call to the /products endpoint. Let's create the record template as new-product.json:
{
  "name": "Hat",
  "description": "Leather hat with a wide brim.",
  "price": 14.99,
  "available": true
}
Then send it to the running web-service:
$ curl -v -H "Content-Type: application/json" --data-binary @new-product.json http://localhost:3001/products
You should get an HTTP 201 response with the new record in the response body. Note that the record ID is generated automatically and is returned in the Content-Location response header (the new individual resource URI) as well as the record in the response body. Since it's the first record that we created, our new product probably got the ID of 1.
Note that the validation rules that we specified in the Product record type definition should work. For example, if we submit the following JSON as a new Product record template:
{
  "price": "WHAAA?!"
}
We will get an HTTP 400 response with the following body:
{
  "errorCode": "X2-RSRC-400-3",
  "errorMessage": "Invalid record data.",
  "validationErrors": {
    "/name": [
      "Missing value."
    ],
    "/price": [
      "Invalid value type string, expected number."
    ],
    "/available": [
      "Missing value."
    ]
  }
}
In the validationErrors object, the invalid record fields are identified by JSON pointers and have arrays of validation error messages associated with them.
So, assuming that our new product record has record ID 1, we can read the record:
$ curl -v http://localhost:3001/products/1 | python -mjson.tool
The response body is our record JSON.
We can also search our products collection (consisting of just one product at the moment). To list all products:
$ curl -v http://localhost:3001/products | python -mjson.tool
Note that the response is a "super-object" that includes the records array. This is because the endpoint is for a collection resource. Later on we are going to see how other collection properties besides the records list can be included in the query response.
To perform records collection search, the collection resource endpoint takes query parameters in the URL. For example:
$ curl -v "http://localhost:3001/products?f$available&f$name:pre=h&p=name,price&o=name&r=0,10" | python -mjson.tool
The query above returns a records array, ordered by product name, containing the product id, product name and product price for the first 10 matching product records available, which have a product name starting with “H” (case-insensitive). To see all the search options read Record Search section of the x2node-ws-resources module's manual.
Now we can try to update our product record. To do that, we are going to send a PATCH request to the Product individual resource endpoint with a JSON patch specification in the body. Let's change our product price and remove the optional product description. To do that, create the patch document in patch-product.json:
[
  { "op": "replace", "path": "/price", "value": 22.50 },
  { "op": "remove", "path": "/description" }
]
And send it to the web-service: (Note: if using the X2 RESTful API Tester make sure application/json-patch+json is present in the 'Content Type' form field.).
$ curl -v -X PATCH -H "Content-Type: application/json-patch+json" --data-binary @patch-product.json http://localhost:3001/products/1
The updated record will be included in the response.
Now, to delete the record, you'd send:
$ curl -v -X DELETE http://localhost:3001/products/1
But don't do it just yet, as we are going to need our product record for further work. Instead, let's go ahead and create an Account record, by creating a new new-account.json template file containing the JSON below:
{
  "email": "edward@revenge.com",
  "firstName": "Edward",
  "lastName": "Teach",
  "passwordDigest": "e87eacd237e856273d00b5cab9141bdffdb5c5a7"
}
The passwordDigest contains hex encoded SHA1 digest of word "blackbeard".
Then send it to the running web-service:
$ curl -v -H "Content-Type: application/json" --data-binary @new-account.json http://localhost:3001/accounts
And an Order record (assuming our new customer account has ID 1 and the product also has ID 1), create a new new-order.json template file containing the JSON below:
{
  "accountRef": "Account#1",
  "placedOn": "2017-08-01",
  "status": "NEW",
  "paymentTransactionId": "Fake-Payments-Backend-Transaction-ID",
  "items": [
    {
      "productRef": "Product#1",
      "quantity": 1
    }
  ]
}
Then send it to the running web-service:
$ curl -v -H "Content-Type: application/json" --data-binary @new-order.json http://localhost:3001/orders
Note how we use references to records of other types. When we search records, we can resolve the references and include the referred records in the response. For example, we may have a screen in the front-end that shows orders. In the same screen, we want to show the ordered products by the product names, not cryptic references, so we can make the call:
$ curl -v "http://localhost:3001/orders?p=*,items.productRef.*" | python -mjson.tool
Along with the records list, in the response we are going to see referredRecords object that maps requested references to the corresponding records. All of that you already know since you've read the Record Search section of the x2node-ws-resources manual, haven't you?
Tightening the Screws
It's nice that we have a what appears to be a fully functioning web-service so quickly, but a closer look reveals some serious problems with our implementation. Let's go over them one by one and fix them.
But first, a few words about the endpoint handlers. The handlers.collectionResource() and handlers.individualResource() handler factory methods can take a second argument, which is the default handler extension. The extension is an object with hooks. Each hook—a function—plugs into a specific point in the handler's call processing logic and allows extending and/or modifying it. Complete descriptions for all available hooks can be found in the Handler Extensions section of the x2node-ws-resources module manual.
To support the enpoint handler extensions we are about to create, replace the API endpoints specified in server.js as per below:
// assemble and run the web-service
ws.createApplication()

    ...

    // add API endpoints
    .addEndpoint(
        '/products',
        handlers.collectionResource(
            'Product', require('./lib/handlers/products.js')))
    .addEndpoint(
        '/products/([1-9][0-9]*)',
        handlers.individualResource(
            'Product', require('./lib/handlers/product.js')))
    .addEndpoint(
        '/accounts',
        handlers.collectionResource(
            'Account', require('./lib/handlers/accounts.js')))
    .addEndpoint(
        '/accounts/([1-9][0-9]*)',
        handlers.individualResource(
            'Account', require('./lib/handlers/account.js')))
    .addEndpoint(
        '/orders',
        handlers.collectionResource(
            'Order', require('./lib/handlers/orders.js')))
    .addEndpoint(
        '/orders/([1-9][0-9]*)',
        handlers.individualResource(
            'Order', require('./lib/handlers/order.js')))
    .addEndpoint(
        '/accounts/([1-9][0-9]*)/orders',
        handlers.collectionResource(
            'accountRef<-Order', require('./lib/handlers/orders.js')))
    .addEndpoint(
        '/accounts/([1-9][0-9]*)/orders/([1-9][0-9]*)',
        handlers.individualResource(
            'accountRef<-Order', require('./lib/handlers/order.js')))

    ...
We recommend keeping each endpoint handler extension in its own file under the project folder: lib/handlers. Note: endpoint handler extension file names differentiated between collections (ending with 's') and individual resources (not ending with 's'). For now, you can create 6 empty handler extensions as specified above, and we will fill them in as we progress through the tutorial. For example, an empty handler extension for products: lib/handlers/products.js, would be:
'use strict';

module.exports = {};
At this stage, we should have the following project structure:
x2tutorial/
+--lib/
|  +--handlers/
|     +--account.js
|     +--accounts.js
|     +--order.js
|     +--orders.js
|     +--product.js
|     +--products.js
|  +--record-type-defs.js
+--misc/
|  +--schema/
|     +--create-schema-mysql.sql
+--node_modules/
|  +--...
+--.env
+--package-lock.json
+--package.json
+--server.js
Now, let's have a look at our problems.
Custom Validation
The standard validators provided by the x2node-validators module, that we used in our record type definitions, cover most of what we need in terms of validating record data submitted to the API, when a new record is created or an existing record is updated. Sometimes however, standard validators are not sufficient. For example, let's say we want to disallow the date in the Order record's placedOn field to ever be on a Saturday. In our record-type-defs.js module, we can add a custom validator and call it notSaturday:
exports.validatorDefs = {
    'notSaturday': function(_, ctx, value) {

        // don't check if the value is missing or an invalid date
        if (!ctx.hasErrorsFor(ctx.currentPointer)) {

            // add validation error if the date is a Saturday
            if ((new Date(value)).getUTCDay() === 6)
                ctx.addError('Leave the world alone once a week!');
        }

        // proceed with the value unchanged
        return value;
    }
};
And then add the validator to the placedOn field definition:
exports.recordTypes = {
    ...
    'Order': {
        ...
        properties: {
            ...
            'placedOn': {
                ...
                validators: [ 'date', 'notSaturday' ],
                ...
            },
            ...
        }
    }
};
The custom validator function receives three arguments:
- Optional parameters such as
['maxLength', 100], etc. Our validator does not have any parameters, so we don't use this argument. - Validation context, which is the API that the framework provides to the validator implementation. See the Validation Context section of the x2node-validators module manual, or the API reference.
- The field value.
If you look at our custom validator code, you'll see first we check for any validation errors already associated with the field. The validators are called by the framework in the same order they are specified in the record type definition. In our case, the notSaturday validator is preceded by the implicit check that the value is provided (the field is not optional) and the explicit check that the value is a valid date (the date standard validator). It does not make sense to test if the date is a Saturday, if the value is empty or not a valid date. The ctx.hasErrorsFor() function allows us to check if the preceding validators failed.
Next, we check if the date is a Saturday, and if so, add a validation error to the context.
Finally, we return the field value. Remember that validators are not just validators. They can also be value normalizers for example, the lowercase normalizer we used on the email field of the Account record type. The function can return a modified value and that will be the value sent back to the record field upon validation completion. Since our validator is a pure validator and does not normalize the value, we simply return it as it was passed to us unmodified.
See the x2node-validators module's manual, for more details on different validation/normalization uses, including custom validation error messages, error message internationalization, validation sets, etc.
New Record Field Uniqueness
In our Account record type the email property is used as the customer login name and therefore is declared unique. However, if we now try to create another record with email field "edward@revenge.com" by sending our new-account.json in a POST to http://localhost:3001/accounts, we are going to get an HTTP 500 error with message "Internal server error". That's bad. This is not an internal server error, this is an invalid request and it should come back with an HTTP 400 response and an explanation.
So, that means in our accounts.js handler extension associated with the /accounts endpoint we need to add logic that checks if another Account record already exists with the same email field before we attempt to save a new record. That can be done in a beforeCreate hook like this:
'use strict';

module.exports = {

    beforeCreate(txCtx, recordTmpl) {

        // check no other account with same email exists
        return txCtx.rejectIfExists(
            'Account', [
                [ 'email => eq', recordTmpl.email ]
            ],
            400, 'Another account with that E-mail exists.'
        );
    }
};
Restart the web-service and try to POST the new-account.json template to the /accounts endpoint again. This time you should get a nice HTTP 400 response.
The txCtx argument passed into the hook is the transaction context, which is an object made available to all hooks and presents the framework's API to the hook implementation. Among other things, the transaction context exposes a number of convenience functions, such as the rejectIfExists() function used in our example above. The function takes the following four arguments:
- Name of the record type to query in the database.
- Record filter specification (read on to see more about it).
- HTTP status code for the error response if the condition is triggered.
- Error message to include in the error response if the condition is triggered.
If the condition is triggered (in our case—matching Account records exist), the function returns a Promise rejected with an error web-service response. Otherwise, it returns nothing. In general, for hooks, if it returns nothing, the API call processing logic continues. If it returns a rejected Promise, the call processing logic is aborted, the database transaction is rolled back and the reason for rejection is returned to the API client.
The complete reference for both the transaction context object and the helper functions it exposes, can be found in the Transaction Context section of the module manual, as well as in the API reference. Various transactional check helper functions exposed by the transaction context, such as the rejectIfExists() used above, take record filter specification as a parameter. This filter specification is passed on to the framework's DBOs module. This is the point where you may want to have a look at the Filter Specification section of the module's manual.
Updated Record Field Uniqueness
So, the code above solves the problem of catching attempts to create a new account with already taken E-mail. What about the situation when we try to update an existing account and change its E-mail? That check can be performed in the account.js individual resource handler:
'use strict';

// used to save the original email value on the transaction context
const ORIGINAL_EMAIL = Symbol();

module.exports = {

    beforeUpdate(txCtx, record) {

        // remember original email on the transaction context
        txCtx[ORIGINAL_EMAIL] = record.email;
    },

    beforeUpdateSave(txCtx, record) {

        // if email changed, make sure no duplicate exists
        if (record.email !== txCtx[ORIGINAL_EMAIL])
            return txCtx.rejectIfExists(
                'Account', [
                    [ 'email => eq', record.email ],
                    [ 'id => not', record.id ]
                ],
                422, 'Another account with that E-mail exists.'
            );
    }
};
Now if we POST another account to /accounts:
{
  "email": "long@walrus.com",
  "firstName": "John",
  "lastName": "Silver",
  "passwordDigest": "0000000000000000000000000000000000000000"
}
and then try to send the following PATCH to /accounts/1 endpoint:
[
  { "op": "replace", "path": "/email", "value": "long@walrus.com" }
]
we are going to get an HTTP 422 response.
The code in the account.js handler shows how we can save arbitrary data on the transaction context and use it for communication between different hooks that way. In our example in the beforeUpdate hook, called before the patch is applied and provided with the unmodified record, we save the original email value on the context. Then, in the beforeUpdateSave hook, called after the patch is applied but before the updated record is saved back to the database, if we see that the email was updated, we perform our duplicate check similarly to how we did it in the beforeCreate hook.
Note, that we recommend using Symbol to save data on the transaction context to aviod any clashes between handlers.
Record Normalization
Another problem related to field uniqueness is that our database does not allow having orders with multiple line items for the same product because our order_items database table has a UNIQUE (order_id, product_id) contstraint. If we try to POST something like the following:
{
  "accountRef": "Account#1",
  "placedOn": "2017-08-01",
  "status": "NEW",
  "paymentTransactionId": "Fake-Payments-Backend-Transaction-ID",
  "items": [
    {
      "productRef": "Product#1",
      "quantity": 1
    },
    {
      "productRef": "Product#1",
      "quantity": 3
    }
  ]
}
to the /orders endpoint, we are again going to get an HTTP 500 error.
This time, we want to preprocess new order records and automatically consolidate line items referring to the same product before saving the order. So, in our orders.js handler we can add the following hook:
'use strict';

module.exports = {

    prepareCreate(_, recordTmpl) {

        // consolidate line items by product
        const itemsByProduct = {};
        for (let item of recordTmpl.items) {
            if (itemsByProduct[item.productRef]) {
                itemsByProduct[item.productRef].quantity += item.quantity;
            } else {
                itemsByProduct[item.productRef] = item;
            }
        }
        recordTmpl.items = Object.values(itemsByProduct);
    }
};
The prepareCreate hook is called before the database transaction is started and allows modification of the submitted record template. Note also that it is called after the record template is validated, so we know that the items array is not empty (since it is declared as optional: false in the record type definition).
Now if we submit JSON with tried before, the order will be created with a single line item for product #1 and quantity 4.
Since our items field is not modifiable (remember we marked it as modifiable: false in the record type definition?), we don't need to worry about similar sitution when an existing Order record is updated.
Referred Records Existence
Another problem with submitting new orders that we have is referring to a non-existant product. For example, if we try to POST the following:
{
  "accountRef": "Account#1",
  "placedOn": "2017-08-01",
  "status": "NEW",
  "paymentTransactionId": "Fake-Payments-Backend-Transaction-ID",
  "items": [
    {
      "productRef": "Product#666",
      "quantity": 1
    }
  ]
}
At the moment, this will lead to another HTTP 500 error. The same will happen with the accountRef points to a non-existant account (note that it can't happen if we use /accounts/{accountId}/orders endpoint—try it and see how it works). And also, if we try to create a new order with a product that exists but is not available, the system will silently allow it. All that means that we have to do some checks in the beforeCreate hook of the orders.js handler:
module.exports = {

    ...

    beforeCreate(txCtx, recordTmpl) {

        // check that account exists
        return txCtx.rejectIfNotExists(
            'Account', [
                [ 'id => is', txCtx.refToId('Account', recordTmpl.accountRef) ]
            ],
            400, 'Account does not exist.'

        // then check if all products exist and are available
        ).then(() => txCtx.rejectIfNotExactNum(
            'Product', [
                [ 'id => in', recordTmpl.items.map(
                    item => txCtx.refToId('Product', item.productRef)) ],
                [ 'available => is', true ]
            ], recordTmpl.items.length,
            400, 'Some products do not exist or are unavailable.'
        ));
    }
};
This is similar to what we've already done in the accounts.js handler, but more different checks are performed. Also note how we use txCtx.refToId() utility function to convert references to record IDs needed by the record filter conditions.
Preventing Referred Records Deletion
Another situation we must gracefully prevent is deleting Product and Account records when Order records exist for them. Currently, (assuming a product with ID 1 has been purchased by a customer with an account which also has an ID of 1) if you try to delete a product with ID 1:
$ curl -v -X DELETE http://localhost:3001/products/1
or delete an account with ID 1
$ curl -v -X DELETE http://localhost:3001/accounts/1
the web-service will return another HTTP 500 error, with an unhelpful error message: "Internal server error".
Instead, the web-service should return a HTTP 400 response with a helpful error message, so let's add the appropriate hooks to our account.js handler:
...

module.exports = {

    ...

    beforeDelete(txCtx) {

        // get account id from the call URI
        const accountId = Number(txCtx.call.uriParams[0]);

        // check if orders exist for the account
        return txCtx.rejectIfExists(
            'Order', [
                [ 'accountRef => is', accountId ]
            ],
            400, 'Orders exist for the account.'
        );
    }
};
And our product.js handler:
'use strict';

module.exports = {

    beforeDelete(txCtx) {

        // get product id from the call URI
        const productId = Number(txCtx.call.uriParams[0]);

        // check if orders exist for the product
        return txCtx.rejectIfExists(
            'Order', [
                [ 'items => !empty', [
                    [ 'productRef => is', productId ]
                ]]
            ],
            400, 'Orders exist for the product.'
        );
    }
};
Note how we extract the addressed record (Account or Product) ID from the call URI. When we used ws.addEntpoint() function in server.js to define the /accounts/{accountId} and /products/{productId} endpoints, we used capturing groups in the URI regular expressions. Those groups translate to the uriParams array on the API call object available to the handlers via the call property of the transaction context. The API call object is what the low-level x2node-ws module operates with and it exposes many useful things to the handlers. See its full description in the Service Call section of the manual as well as its full API reference.
You should also take note that in this case, we don't need to call the txCtx.refToId() function in order to convert the reference to the ID, as we are getting the ID straight from the URI.
Backend Field Value Calculation
When we work with our Account records, we have to provide a passwordDigest value to the API, so code running on the client must compute the digest. However, ultimately the password check will be performed by the server. For this to work, we must maintain the digest algorithms on both the client and server, keeping them in sync. Also, another potential issue with this approach is, cryptographic digest functionality may not be readily available on the client.
Therefore, when the client creates and updates Account records, we'd rather have it send the account password in plain text and have our web-service calculate the digest.
Important: Please make sure that in a production environment sensitive information such as plain text passwords are exchanged between the client and the web-service over a secure connection (SSL).
First, let's see how this can be done for a call to create a new account.
A record template submitted with a POST call to our /accounts endpoint, can have fields that are not described in the record type definition. Such fields are simply ignored by the framework. So, we could include a password field in the record template and have a hook in our accounts.js handler convert it to the passwordDigest value required. However, this must happen before the template is validated, as passwordDigest is a required field, so for this purpose we will use the prepareCreateSpec hook:
...

const crypto = require('crypto');

module.exports = {

    prepareCreateSpec(_, recordTmpl) {

        // calculate password digest if plain password was attached
        if (typeof recordTmpl.password === 'string') {
            recordTmpl.passwordDigest = crypto
                .createHash('sha1')
                .update(recordTmpl.password, 'utf8')
                .digest('hex');
            delete recordTmpl.password;
        }
    },

    ...
};
Now, if we create a new Account record, by replacing the contents of the new-account.json record template file created earlier, with the JSON below:
{
  "email": "bones@walrus.com",
  "firstName": "Billy",
  "lastName": "Bones",
  "password": "hoistthesales!"
}
and POST it to the web-service;
$ curl -v -H "Content-Type: application/json" --data-binary @new-account.json http://localhost:3001/accounts
the record created will be something like this:
{
  "id": 3,
  "email": "bones@walrus.com",
  "firstName": "Billy",
  "lastName": "Bones",
  "passwordDigest": "280c45042d9208401640e7fa7065abc31056d6b6"
}
Let's see how we can do the same when updating an account.
There is a hook called prepareUpdateSpec, which is called before the patch specification document is parsed by the handler. That gives the handler a chance to modify the patch document before it is processed. Up to this point we have used the JSON Patch format for all PATCH calls. The problem with using this format is, it's tricky to write logic that analyzes the patch document to check for a password field and then to modify it before proceeding. However, the handler, also supports another patch document format: JSON Merge Patch. Therefore, by using the JSON Merge Patch format instead, we can use similar logic as we have used before in the prepareCreateSpec hook.
So, to implement this, add the prepareUpdateSpec hook to the account.js handler as per below:
...

const crypto = require('crypto');

module.exports = {

    prepareUpdateSpec(txCtx, patchSpec) {

        // calculate password digest if plain password was included in merge patch
        if (txCtx.call.entityContentType === 'application/merge-patch+json' &&
            typeof patchSpec.password === 'string') {
            patchSpec.passwordDigest = crypto
                .createHash('sha1')
                .update(patchSpec.password, 'utf8')
                .digest('hex');
            delete patchSpec.password;
        }
    },

    ...
};
We can test this by creating a new patch document which complies with the JSON Merge Patch format standards called json-merge-patch-account.json, containing the JSON below:
{
  "firstName": "William",
  "password": "piecesofeight!"
}
Now, if we send a PATCH request to the /accounts/3 endpoint (assuming we intend to update an account with an ID of 3)
Note: if using the X2 RESTful API Tester make sure application/merge-patch+json is present in the 'Content Type' form field.):
$ curl -v -X PATCH -H "Content-Type: application/merge-patch+json" --data-binary @json-merge-patch-account.json http://localhost:3001/accounts/3
we will get back our updated record:
{
  "id": 3,
  "email": "bones@walrus.com",
  "firstName": "William",
  "lastName": "Bones",
  "passwordDigest": "5f20ff23887f744dc15da7987a8b6e92e303becd"
}
But if we really want to support both patch formats, we will have to write something like this in our account.js:
function digestPassword(password) {

    return crypto
        .createHash('sha1')
        .update(password, 'utf8')
        .digest('hex');
}

module.exports = {

    prepareUpdateSpec(txCtx, patchSpec) {

        // calculate password digest if plain password is updated
        switch (txCtx.call.entityContentType) {
        case 'application/merge-patch+json':
            if (typeof patchSpec.password === 'string') {
                patchSpec.passwordDigest = digestPassword(patchSpec.password);
                delete patchSpec.password;
            }
            break;
        case 'application/json-patch+json':
            txCtx.patchSpec = txCtx.patchSpec.map(op => (
                op.op === 'replace' && op.path === '/password' &&
                    typeof op.value === 'string'
                    ? {
                        op: 'replace',
                        path: '/passwordDigest',
                        value: digestPassword(op.value)
                    }
                    : op
            ));
        }
    },

    ...
};
Now we support both:
JSON Patch format
Note: if using the X2 RESTful API Tester make sure application/json-patch+json is present in the 'Content Type' form field.):
Create a new patch document which complies with the JSON Patch format standards called json-patch-account.json, containing the JSON below:
[
  {
    "op": "replace",
    "path": "/firstName",
    "value": "William"
  },
  {
    "op": "replace",
    "path": "/password",
    "value": "piecesofeight!"
  }
]
$ curl -v -X PATCH -H "Content-Type: application/json-patch+json" --data-binary @json-patch-account.json http://localhost:3001/accounts/3
JSON Merge Patch format
Note: if using the X2 RESTful API Tester make sure application/merge-patch+json is present in the 'Content Type' form field.):
$ curl -v -X PATCH -H "Content-Type: application/merge-patch+json" --data-binary @json-merge-patch-account.json http://localhost:3001/accounts/3
Backend Operations
Our Order record type defines a status field, which influences what operations can be performed on the records. Here is the logic we want to implement when working with the order statuses:
When a new order is submitted to our web-service the record template's
statusfield must have value NEW and itspaymentTransactionIdfield must be empty. Also, the template must include two additional fields that are not defined in the record type and are not stored in the database: the credit card number and the credit card expiration date. Those fields are used to authorize the payment in our 3rd-party payments processing backend, after which the order is assigned a payment transaction id and is saved in the database with status NEW.Once placed, our orders may not be changed. When an existing order record is being updated, the only field that is allowed to be changed is the order status, which triggers corresponding action in the payments processing backend. Only the following status transitions are allowed on order record update:
- From NEW to SHIPPED, in which case the payments backend is asked to capture the authorized payment.
- From NEW or CANCELED, in which case the payments backend is asked to void the transaction.
For our tutorial, let's create a mock payments backend service in lib/payments-service.js in our project. Something like this:
'use strict';

const crypto = require('crypto');
const common = require('x2node-common');

const log = common.getDebugLogger('PAYMENTS');

exports.authorizePayment = function(ccNumber, ccExpDate, amount) {

    return new Promise((resolve, reject) => {

        // check expiration date
        const ccExpDateDt = new Date(ccExpDate);
        const nowDt = new Date();
        if (ccExpDateDt.getUTCFullYear() * 12 + ccExpDateDt.getUTCMonth() <
            nowDt.getUTCFullYear() * 12 + nowDt.getUTCMonth())
            return reject(new Error('Credit card has expired.'));

        // all good, generate payment transaction id
        crypto.randomBytes(20, (err, buf) => {
            if (err)
                return reject(err);
            const txId = buf.toString('hex');
            log(`payment ${txId} authorized for $${amount}`);
            resolve(txId);
        });
    });
};

exports.capturePayment = function(txId) {

    return new Promise(resolve => {
        setTimeout(() => { log(`payment ${txId} captured`); resolve(); }, 200);
    });
};

exports.voidPayment = function(txId) {

    return new Promise(resolve => {
        setTimeout(() => { log(`payment ${txId} voided`); resolve(); }, 200);
    });
};
There is a couple of points about this code that are worth mentioning:
The operations are asynchronous and return promises. This is to emulate calls to a thrid-party backend service. The
authorizePayment()method can trigger a payment backend error condition if the submitted credit card expiration date is in the past (useful for testing!).We use the debug logger provided by the framework's x2node-common module. To see the message, make sure you include "PAYMENTS" in your
NODE_DEBUGenvironment variable (see Node.js documentation if you are not yet familiar with it).
Otherwise, it's pretty straightforward.
Since our application now uses x2node-common module directly, we need to add it to the project:
$ npm install --save x2node-common
Now, let's look at our Order record type definition, in particular at the status and paymentTransactionId fields:
exports.recordTypes = {
    ...
    'Order': {
        ...
        properties: {
            ...
            'status': {
                valueType: 'string',
                validators: [ ['oneOf', 'NEW', 'SHIPPED', 'CANCELED'] ]
            },
            'paymentTransactionId': {
                valueType: 'string',
                column: 'payment_txid',
                validators: [ ['maxLength', 100] ],
                modifiable: false
            },
            ...
        }
    }
};
The problem here is that it will let us POST an order template with status value other than NEW, which should be disallowed. It will also not allow us to POST and order template without a payment transaction id, because it is a required field (and it is indeed not nullable in the database). That means that we need different validation rules for the two distinct cases: creating new record and updating an existing record. As you were reading through the x2node-validators module documentation, you may have noticed the feature called Validation Sets. The x2node-ws-resources module uses two different validation sets for the two cases: onCreate and onUpdate. We can use it to adjust our validation rules. Our adjusted record type definition then will look like the following:
exports.recordTypes = {
    ...
    'Order': {
        ...
        properties: {
            ...
            'status': {
                valueType: 'string',
                // two different sets of validators for creates and updates
                validators: {
                    'onCreate': [ ['oneOf', 'NEW'] ], // allow only NEW on create
                    'onUpdate': [ ['oneOf', 'NEW', 'SHIPPED', 'CANCELED'] ]
                }
            },
            'paymentTransactionId': {
                valueType: 'string',
                column: 'payment_txid',
                optional: true, // allow empty in the new record template
                validators: {
                    'onCreate': [ 'empty' ],    // require empty on create
                    'onUpdate': [ 'required' ], // it's not really optional
                    '*': [ ['maxLength', 100] ] // general length limitation
                },
                modifiable: false
            },
            ...
        }
    }
};
And now, onto our handlers! First of all, let's add new logic to the orders.js handler for when a new order is submitted. There are couple of things we need to do. First, we must require valid payment information in the order template. We could just write the logic for checking if the payment information is missing or is invalid right in the prepareCreate hook, but wouldn't it be nice to define the fields the same way we defined our persistent fields in the record type definition? That way we would be able to use the validators. The problem is that we can't add those fields directly into our Order record type definition, because those fields are not persistent and are only used with the new order record template. What we can do instead is to define another tiny, local record types "library" that will include the additional fields and that way we will be able to call the validators in the hook.
First, we need to add the x2node-validators module to our project since we are going to be using it directly:
$ npm install --save x2node-validators
And now let's add the logic to our orders.js:
...

// load the framework modules
const records = require('x2node-records');
const validators = require('x2node-validators');
const ws = require('x2node-ws');

// define additional fields in the new order template
const orderTemplateDef = records.with(validators).buildLibrary({
    recordTypes: {
        'OrderTemplate': {
            properties: {

                // id field definition is required
                'id': {
                    valueType: 'number',
                    role: 'id',
                    validators: [ '-required' ] // don't require
                },

                // payment information
                'creditCardNumber': {
                    valueType: 'string',
                    validators: [ 'ccNumber' ]
                },
                'creditCardExpDate': {
                    valueType: 'string',
                    validators: [ ['pattern', /20\d{2}-(0[1-9]|1[0-2])/] ]
                }
            }
        }
    }
});

module.exports = {

    prepareCreate(_, recordTmpl) {

        // make sure we have payment information in the record template
        const errors = validators.normalizeRecord(
            orderTemplateDef, 'OrderTemplate', recordTmpl);
        if (errors)
            return Promise.reject(ws.createResponse(400).setEntity({
                errorMessage: 'Invalid new order data.',
                validationErrors: errors
            }));

        // consolidate line items by product
        ...
    },

    ...
};
Note that we had to "dance around" the id field a little bit. The x2node-records module requires an ID for every record type, so we have to include it in our additional record type definition. On the other hand, the new order template does not have the ID when submitted so the validators complain because the field is required and it is missing. What we do then is we disable the implicitly assigned required validator on the id field by including it with a minus sign like -required.
When we detect a validation error, we use the framework's low-level web-service module x2node-ws to create an error response and return it as a rejected promise. By returning a rejected promise, the hook aborts the rest of the call processing logic, rolls back the database transaction and sends the rejection reason as the response to the API client. The ws.createResponse() function is used to create API response objects.
The subsequent custom handler logic happens within the transaction, so it all goes into our beforeCreate hook.
First, in order to calculate the order amount we need to load the ordered products information. In the previous iteration of our hook we are already checking if all the ordered products exist and are avaiable. We used rejectIfNotExactNum() helper function on the transaction context for that. The function is great, but it only counts the matching records without returning us the records' data. So, we need to replace it with a fetch() helper function that allows loading the matched records from the database:
module.exports = {

    ...

    beforeCreate(txCtx, recordTmpl) {

        // check that account exists
        return txCtx.rejectIfNotExists(
            ...

        // then fetch ordered product prices to calculate the order amount
        ).then(() => txCtx.fetch(
            'Product', {
                props: [ 'price' ],
                filter: [
                    [ 'id => in', recordTmpl.items.map(
                        item => txCtx.refToId('Product', item.productRef)) ],
                    [ 'available => is', true ]
                ],
                lock: 'shared'
            }

        // then process the fetched products
        )).then(productsResult => {

            // make sure all products exist and are available
            if (productsResult.records.length !== recordTmpl.items.length)
                return Promise.reject(ws.createResponse(400).setEntity({
                    errorMessage: 'Some products do not exist or are unavailable.'
                }));

            // calculate the order total
            const productPrices = productsResult.records.reduce(
                (productPrices, product) => {
                    productPrices[`Product#${product.id}`] = product.price;
                    return productPrices;
                }, new Object());
            return recordTmpl.items.reduce(
                (orderAmount, item) => (
                    orderAmount + productPrices[item.productRef] * item.quantity
                ), 0);
        })

        ...
    }

};
Note that we lock the matched product records in shared mode so that nobody changes or deletes them before the order transaction is completed.
Now that we have the order amount and everything about the order has been validated, we can call our payments backend service and authorize the payment. Once the payment is authorized, we will have the payment transaction ID, which we can add to the order record template and proceed with saving it:
...

// load the payments backend service module
const paymentsService = require('../payments-service.js');

module.exports = {

    ...

    beforeCreate(txCtx, recordTmpl) {

        // check that account exists
        return txCtx.rejectIfNotExists(
            ...

        // then fetch ordered product prices to calculate the order amount
        ).then(() => txCtx.fetch(
            ...

        // then process the fetched products
        )).then(productsResult => {
            ...

        // then authorize the payment and get the payment transaction id
        }).then(orderAmount => paymentsService.authorizePayment(
            recordTmpl.creditCardNumber, recordTmpl.creditCardExpDate, orderAmount

            // catch payment error
            ).catch(paymentError => Promise.reject(
                ws.createResponse(400).setEntity({
                    errorMessage: `Could not process payment: ${paymentError.message}`
                })
            )

        // then set the payment transaction id on the order record
        )).then(paymentTransactionId => {
            recordTmpl.paymentTransactionId = paymentTransactionId;
        });
    }
};
That's all. Fire up our web-service, go to the API tester and play with submitting new orders!
Note, that in real life online order processing system you probably wouldn't want to keep an active database transaction with locked data while waiting for a response from a 3rd-party service like we do in the code above, but it works well for the purpose of our tutorial. Just a disclaimer…
Next, we need to turn our attention to the order update logic. In the order.js handler:
'use strict';

const ws = require('x2node-ws');

const paymentsService = require('../payments-service.js');

// used to save original order status on the transaction context
const ORIGINAL_STATUS = Symbol();

module.exports = {

    beforeUpdate(txCtx, record) {

        // save original order status
        txCtx[ORIGINAL_STATUS] = record.status;
    },

    beforeUpdateSave(txCtx, record) {

        // check if status changed and perform corresponding actions
        const originalStatus = txCtx[ORIGINAL_STATUS];
        if (record.status !== originalStatus) {

            // only NEW order can be updated
            if (originalStatus !== 'NEW')
                return Promise.reject(ws.createResponse(409).setEntity({
                    errorMessage: 'Invalid order status transition.'
                }));

            // execute payment backend action
            switch (record.status) {
            case 'SHIPPED':

                // capture the payment transaction
                return paymentsService.capturePayment(record.paymentTransactionId);

            case 'CANCELED':

                // void the payment transaction
                return paymentsService.voidPayment(record.paymentTransactionId);
            }
        }
    }
};
Disabling Certain Methods
Once an Order record is created, it cannot be deleted (its status can be changed to CANCELED though). But at the moment, if we send a DELETE request to a /orders/{orderId} endpoint, our web-service will happily delete the record. We must tell our order.js handler that it does not support DELETE method.
The handler objects created by the x2node-ws-resources module's handlers factory follow the handler specification understood by the low-level x2node-ws module. The handler object exposes functions for every HTTP method it supports, such as GET(), POST(), etc. The default handler built by the handlers.individualResource() factory method in our server.js contains a DELETE() method, so all we need to do to disable it is to delete the method from the handler. The hook called right after the handler is constructed by the factory is called configure. So, in our order.js handler we can add:
module.exports = {

    configure() {

        // get rid of the DELETE method implementation
        this.DELETE = false;
    },

    ...
};
Now, if we send a DELETE request to /order/{orderId} end point we will get a nice HTTP 405 error.
Conditional Requests
One of the most powerful features of x2node is automatic support for Conditional Requests. The framework can automatically generate ETag and Last-Modified HTTP headers for you, which can dramatically improve your web-service performance.
At the moment, if you send a GET request to our, say, product endpoint, you won't get either the ETag nor the Last-Modified headers in the response:
GET /products/1 HTTP/1.1
Host: localhost:3001
User-Agent: curl/7.54.1
Accept: */*

HTTP/1.1 200 OK
Vary: Origin
Cache-Control: no-cache
Expires: 0
Pragma: no-cache
Content-Type: application/json
Content-Length: 98
Date: Fri, 04 Aug 2017 21:21:33 GMT
Connection: keep-alive

...
That makes conditional requests impossible. What we need to do is to add record meta-information properties to our record types. The framework supports and automatically maintains five record meta-information property types:
- Record version, which is used to calculate the resource
ETag. The version is usually an integer number stored in its own column in the record type's main database table. Whenever the framework updates a record, it bumps up the version field (if the record type defines it). - Record creation timestamp, which is automatically assigned to a record when it is created and never changes. The property is not used for conditional requests, but sometimes is nice to have it stored in the database for audit.
- Record creation actor, whch is the stamp of the actor that created the record. Also never changes, not used for conditional requests and only serves for audit purposes.
- Record last modification timestamp. This property is automatically maintained and is used to calculate the
Last-Modifiedheader. - Record last modification actor stamp, useful for audit.
All, none of some of these meta-properties can be defined on a record type. The framework will use and maintain what's available. You can read about all of these meta-propertues in the Record Meta-Info Properties section of the x2node-dbos module manual. For our tutorial, let's use all of them.
First, we need to add the columns to our tables in the database:
ALTER TABLE products
    ADD COLUMN version INTEGER UNSIGNED NOT NULL,
    ADD COLUMN created_on TIMESTAMP(3) DEFAULT 0,
    ADD COLUMN created_by VARCHAR(60) NOT NULL,
    ADD COLUMN modified_on TIMESTAMP(3) NULL,
    ADD COLUMN modified_by VARCHAR(60);

UPDATE products SET version = 1, created_on = CURRENT_TIMESTAMP, created_by = 'admin';

ALTER TABLE accounts
    ADD COLUMN version INTEGER UNSIGNED NOT NULL,
    ADD COLUMN created_on TIMESTAMP(3) DEFAULT 0,
    ADD COLUMN created_by VARCHAR(60) NOT NULL,
    ADD COLUMN modified_on TIMESTAMP(3) NULL,
    ADD COLUMN modified_by VARCHAR(60);

UPDATE accounts SET version = 1, created_on = CURRENT_TIMESTAMP, created_by = 'admin';

ALTER TABLE orders
    ADD COLUMN version INTEGER UNSIGNED NOT NULL,
    ADD COLUMN created_on TIMESTAMP(3) DEFAULT 0,
    ADD COLUMN created_by VARCHAR(60) NOT NULL,
    ADD COLUMN modified_on TIMESTAMP(3) NULL,
    ADD COLUMN modified_by VARCHAR(60);

UPDATE orders SET version = 1, created_on = CURRENT_TIMESTAMP, created_by = 'admin';
Now, let's add the meta-info properties to the record type definitions in our record-type-defs.js:
...

const BASIC_RECORD_PROPS = {
    'id': {
        valueType: 'number',
        role: 'id'
    },
    'version': {
        valueType: 'number',
        role: 'version'
    },
    'createdOn': {
        valueType: 'datetime',
        role: 'creationTimestamp',
        column: 'created_on'
    },
    'createdBy': {
        valueType: 'string',
        role: 'creationActor',
        column: 'created_by'
    },
    'modifiedOn': {
        valueType: 'datetime',
        role: 'modificationTimestamp',
        optional: true,
        column: 'modified_on'
    },
    'modifiedBy': {
        valueType: 'string',
        role: 'modificationActor',
        optional: true,
        column: 'modified_by'
    }
};

exports.recordTypes = {
    'Product': {
        table: 'products',
        properties: Object.assign({}, BASIC_RECORD_PROPS, {
            // don't forget to remove id, it's in the withRecordProps now
            ...
        })
    },
    'Account': {
        table: 'accounts',
        properties: Object.assign({}, BASIC_RECORD_PROPS, {
            // remove the id
            ...
        })
    },
    'Order': {
        table: 'orders',
        properties: Object.assign({}, BASIC_RECORD_PROPS, {
            // remove the id
            ...
        })
    }
};
The code above shows another useful technique: when there are common properties for different record types, instead of copy-pasting their definitions you can extract them into an object (another technique for that is using inheritance—the records module understands prototype chains in the definitions).
Now, if we query our product the result is going to be slightly different:
GET /products/1 HTTP/1.1
Host: localhost:3001
User-Agent: curl/7.54.1
Accept: */*

HTTP/1.1 200 OK
ETag: "dev-1501957208544:*:1"
Last-Modified: Thu, 01 Jan 1970 00:00:00 GMT
Vary: Origin
Cache-Control: no-cache
Expires: 0
Pragma: no-cache
Content-Type: application/json
Content-Length: 169
Date: Sat, 05 Aug 2017 18:20:09 GMT
Connection: keep-alive

...
Note that we now have ETag and Last-modified headers in the response. So, a conditional request with If-None-Match request header is now possible:
GET /products/1 HTTP/1.1
Host: localhost:3001
User-Agent: curl/7.54.1
Accept: */*
If-None-Match: "dev-1501957208544:*:1"

HTTP/1.1 304 Not Modified
ETag: "dev-1501957208544:*:1"
Last-Modified: Thu, 01 Jan 1970 00:00:00 GMT
Vary: Origin
Cache-Control: no-cache
Expires: 0
Pragma: no-cache
Date: Sat, 05 Aug 2017 18:22:36 GMT
Connection: keep-alive
And what we get is an HTTP 304 response. A browser that runs our client application will be automatically caching the responses and sending conditional requests when appropriate.
A couple of words about the "anatomy" of the ETag header. It consists of three parts: the application version (because with an application update the response may change), the authenticated actor (because different actors may get different response), and the record version. The actor is "*" in our case, because the request was not authenticated. Otherwise, it would be the actor ID, about which you will see further in this tutorial.
The application version part of the ETag value is interesting. When the application is running in the development mode (remember how we are starting our web-service with NODE_ENV=development?), the version is dev- followed with the start timestamp. That way, each time the application is restarted in the development mode all cached ETags become invalidated, because the timestamp changes. In production mode, when NODE_ENV=production, the version is taken from the application's package.json. This logic can be overriden by the application by explicitely providing the application object with apiVersion configuration property. See Application Configuration section in the x2node-ws module documentation for more detail.
So what we did so far made our individual resource endpoints support conditional HTTP requests. But what about our collection resource endpoints? They still do not return either ETag nor Last-Modified:
GET /products HTTP/1.1
Host: localhost:3001
User-Agent: curl/7.54.1
Accept: */*

HTTP/1.1 200 OK
Vary: Origin
Cache-Control: no-cache
Expires: 0
Pragma: no-cache
Content-Type: application/json
Content-Length: 461
Date: Sat, 05 Aug 2017 18:34:32 GMT
Connection: keep-alive

...
To implement conditional requests for collection resource endpoints we need something that will be keeping track not of individual record versions but of the changes in the whole collection of records of the given type. In x2node that something is called record collections monitor. The monitor implementation, once assigned to a DBO factory, gets notified by the DBOs when records of a given record type are created, updated or deleted giving it a chance to keep track of the records collection version. Then, the collection resource endpoint handlers can consult with the monitor and calculate version information for a given records search request.
Different record collections monitor implementations may use different techniques where to keep the collection versioning information. In our tutorial we are going to use an implementation included in the framework as x2node-dbos-monitor-dbtable module. The module creates and maintaince a table called x2rcinfo in the database together with the main records tables. That way, all record collections version changes are kept transactional together with the record changes. Let's add it to our application. First, we need to add the module to our project:
$ npm install --save x2node-dbos-monitor-dbtable
Now, we need to assign it to our DBO factory in the server.js:
// load framework modules
...
const rcMonitor = require('x2node-dbos-monitor-dbtable');

...

// create DBO factory for our record types library, MySQL flavor
const dboFactory = ...

// wrap the database connections pool with a generic interface for the framework
const ds = ...

// assign record collections monitor to the DBO factory
rcMonitor.assignTo(dboFactory, ds);

...
That's all! Now our collection search request will get ETag and Last-Modified headers in the response:
GET /products HTTP/1.1
Host: localhost:3001
User-Agent: curl/7.54.1
Accept: */*

HTTP/1.1 200 OK
ETag: "dev-1501958928576:*:0"
Last-Modified: Thu, 01 Jan 1970 00:00:00 GMT
Vary: Origin
Cache-Control: no-cache
Expires: 0
Pragma: no-cache
Content-Type: application/json
Content-Length: 461
Date: Sat, 05 Aug 2017 18:49:43 GMT
Connection: keep-alive
There is one little problem that remains—if we try to create a new Account now with an unauthenticated POST to /accounts endpoint, we are going to get a nasty internal server error with "Operation may not be anonymous." as an explanation. That is because our Account record type has createdBy meta-info property, having which disallows creating records without an authenticated actor. To fix that, our handler must let the framework know that the POST is being made on behalf of the customer creating his or her own account. Let do that in our accounts.js handler:
module.exports = {

    ...

    beforeCreate(txCtx, recordTmpl) {

        // check no other account with same email exists
        return txCtx.rejectIfExists(
            ...

        // if unauthenticated, assume the customer as the call actor
        ).then(() => {
            if (!txCtx.call.actor)
                txCtx.call.actor = {
                    stamp: recordTmpl.email
                };
        });
    }
};
We started talking about actors and authentication, so next let's see what's up with that.
Authentication and Authorization
You must have noticed that so far we did nothing about authenticating our users and checking their permissions. Let's fix it now.
There are two ways how an endpoint can be protected:
The endpoint handler can implement
isAllowed()method. The method is called before any call processing logic is invoked and is passed a Service Call object. If the method returnsfalse, the call is prohibited.An Authorizer can be registered on the application to cover all endpoints matching certain URI pattern. Multiple authorizers can match a single URI and they all are combined (plus the handler's
isAllowed()method, if any).
Let's have a look at our endpoints one by one and decide how we are going to protect each one of them.
The /products and /products/{productId} endpoints are very straightforward: GET is allowed to anybody and all other methods require an admin. This can be easily done in an authorizer in our server.js:
ws.createApplication()

    ...

    // protect the endpoints with authorizers
    .addAuthorizer(
        '/products.*',
        call => (
            call.method === 'GET' ||
                (call.actor && call.actor.hasRole('admin'))))

    // add API endpoints
    ...
The call.actor condition makes sure that the call is authenticated (not anonymous) and call.actor.hasRole('admin') makes sure that the authenticated actor is an admin.
Another straightforward endpoints pair is /orders and /orders/{orderId}. These two simply require an admin for everything. So:
ws.createApplication()

    ...

    .addAuthorizer(
        '/orders.*',
        call => (call.actor && call.actor.hasRole('admin')))

    ...
But the /accounts endpoint and all of its sub-resource endpoints are a bit more complicated. Here are our authorizers:
ws.createApplication()

    ...

    .addAuthorizer(
        '/accounts',
        call => (
            call.method === 'POST' ||
                (call.actor && call.actor.hasRole('admin'))))
    .addAuthorizer(
        '/accounts/.*',
        call => (
            call.actor && (
                call.actor.hasRole('admin') || call.actor.id === Number(call.uriParams[0])))
    )

    ...
We allow anyone to POST to our Account collection resource endpoint and GET (search accounts) only to an admin. Then, the individual account resource endpoint allows to do anything to either an admin or the account owner (the authenticated actor ID is the same as the one in the URI). This also convenienty covers the /accounts/{accountId}/orders endpoints and explains why we wanted to have them in the first place.
There is only one tiny issue that remains to be addressed—only an admin can update an order and make it SHIPPED. That addition goes into our beforeUpdateSave hook in the order.js handler:
module.exports = {

    ...

    beforeUpdateSave(txCtx, record) {

        // check if status changed and perform corresponding actions
        const originalStatus = txCtx[ORIGINAL_STATUS];
        if (record.status !== originalStatus) {

            ...

            // execute payment backend action
            switch (record.status) {
            case 'SHIPPED':

                // only and admin can make the order SHIPPED
                if (!txCtx.call.actor.hasRole('admin'))
                    return Promise.reject(ws.createResponse(403).setEntity({
                        errorMessage: 'Insufficient permissions.'
                    }));

                // capture the payment transaction
                return paymentsService.capturePayment(record.paymentTransactionId);

                ...
            }
        }
    }
};
So that covers the authorization part. But what about the authentication? The x2node-ws module uses Authenticators for that. And authenticator is associated with a certain URI pattern and extracts an actor handle from the HTTP request. The actor handle is then used to lookup the actor in the user database called actors registry. The actors registry is a component provided by the application. It can lookup the actor by the handle, verify the actor's credentials if utilized by the authentication scheme, determine the actor's roles in the context of the application. In x2node the authenticator is decoupled from the actors registry. The only responsibility of the authenticator is to extract the actor handle and possibly the credentials from the request and pass them to the actors registry.
So, first, let's create our actors registry in lib/actors-registry.js in our project:
'use strict';

const dbos = require('x2node-dbos');

class MyActorsRegistry {

    constructor(ds, dboFactory) {

        // save the database connections pool reference
        this.ds = ds;

        // build and save account fetch DBO
        this.accountFetch = dboFactory.buildFetch('Account', {
            props: [ 'id', 'email' ],
            filter: [
                [ 'email => is', dbos.param('email') ]
            ]
        });
    }

    lookupActor(handle) {

        // admin is a special case
        if (handle === 'admin')
            return {
                id: 0,
                stamp: 'admin',
                hasRole: () => true
            };

        // get database connection and lookup account record by email
        let dbConnection;
        return this.ds.getConnection(

        // execute account lookup DBO
        ).then(con => this.accountFetch.execute(dbConnection = con, null, {
            email: handle

        // get matched account, if any, from the lookup result
        })).then(result => (
            result.records.length > 0 ? result.records[0] : null

        // build and return actor object if account found
        )).then(account => (
            account ?
                {
                    id: account.id,
                    stamp: account.email,
                    hasRole: () => false
                }
                : null

        // release the database connection
        )).then(

            // success
            actor => (this.ds.releaseConnection(dbConnection), actor),

            // error
            err => (
                dbConnection ?
                    (this.ds.releaseConnection(dbConnection), Promise.reject(err))
                    : Promise.reject(err)
            )
        );
    }
}

// export the registry class
module.exports = MyActorsRegistry;
Several points about our actors registry implementation:
Admin user is special. We reserve "admin" actor handle for it.
The rest of the actors are customers. We use email address to lookup matching Account records. For that, our registry constructor recieves the database connections pool and the DBO factory, which it uses to construct a fetch DBO for perform the Account record lookups. So far, this is the only place in our application where we use the x2node-dbos module directly.
The actor objects returned by the registry have three elements:
- The
idproperty, which is the actor id. In our application it is the same value as the Account record id. Remember how we use the authenticated actor ID to match with the account ID in the call URI to protect all/account/{accountId}endpoints? This is where it comes from. - The
stampproperty, which is used to identify the actor in such places as audit logs. For that reason it needs to be something that uniquely identifies the actor, is relatively short and more-or-less human readable. Our application uses theemailvalue of the Account record for that purpose. - And finally the
hasRole()method, which tells if the actor has the role passed to it as an argument. Since in our case we have only one role, that is the "admin", we simply returntrueorfalsebased on whether the actor is an admin or a customer.
- The
If no matching actor is found in the registry, it is not an error. It simply reports that no matching actor exists by returning a
null(or a promise of it, as in our case). The authenticator then will treat the call as unauthenticated. If the promise is rejected, the situation is treated as an unexpected exception, which most likely will lead to an HTTP 500 response.
Now we are ready to add an authenticator to our application. Many modern web-services use JWT (see RFC 7519) with Bearer HTTP authentication scheme associated with OAuth 2.0 (see RFC 6750). Let's use it for our application too, which is especially convenient since x2node includes a JWT-based authenticator implementation in its x2node-ws-auth-jwt module.
First, let's add the JWS authenticator module to our project:
$ npm install --save x2node-ws-auth-jwt
Now we can add it in our server.js:
...

// load framework modules
...
const JWTAuthenticator = require('x2node-ws-auth-jwt');

...

// assemble and run the web-service
ws.createApplication()

    ...

    // add authenticator
    .addAuthenticator(
        '/.*',
        new JWTAuthenticator(
            new (require('./lib/actors-registry.js'))(ds, dboFactory),
            new Buffer(process.env.SECRET, 'base64'), {
                iss: 'x2tutorial',
                aud: 'client'
            }
        ))

    ...
Our authenticator uses a new environment variable SECRET, which is the secret key for our access token signatures in BASE64 encoding. You can generate the key, for example, with OpenSSL:
$ openssl rand -base64 32
hKiY0xP600FHbgQS2y14F7ckqbfai99AZwF6hYvW0lM=
and then add it to our .env file:
...

#
# Secret key.
#
SECRET=hKiY0xP600FHbgQS2y14F7ckqbfai99AZwF6hYvW0lM=
That's it, we are fully secured! One little problem remains—where do we get the JWT tokens to send to our API endpoints in the Authorization HTTP request header? And about that is in the next section.
User Login
There is one endpoint that remains not implementation, the /login endpoint. This endpoint is not a resource matching a persistent record type, so we are not going to use our resource endpoint handlers factory provided by the x2node-ws-resources module. Instead, we are going to write a handler used directly by the low-level x2node-ws module. But first, let add to the project what we are going to need to implement user login logic based on JWTs.
Our admin user does not have an account in the database, so let's have a hardcoded login name "admin" used for it and have the password in the application runtime environment. So, add something like the following to the .env file:
...

#
# Admin password.
#
ADMIN_PASSWORD=DontTellAnybody
When a login is successful, we are going to need to create and sign a JWT. Let add a 3rd-party module to our project that we are going to use for that purpose:
$ npm install --save jws
Now we've got everything we need to write our login endpoint handler in lib/handlers/login.js:
'use strict';

const ws = require('x2node-ws');
const dbos = require('x2node-dbos');
const jws = require('jws');
const crypto = require('crypto');

class LoginHandler {

    constructor(ds, dboFactory) {

        // save the database connections pool reference
        this.ds = ds;

        // build and save account fetch DBO
        this.accountFetch = dboFactory.buildFetch('Account', {
            props: [ 'id', 'email', 'firstName', 'lastName' ],
            filter: [
                [ 'email => is', dbos.param('email') ],
                [ 'passwordDigest => is', dbos.param('passwordDigest') ]
            ]
        });

        // save secret key for token signatures
        this.secret = new Buffer(process.env.SECRET, 'base64');

        // save admin password
        this.adminPassword = process.env.ADMIN_PASSWORD;
    }

    POST(call) {

        // get and validate login information
        const loginInfo = call.entity;
        if (!loginInfo || typeof loginInfo.username !== 'string' ||
            typeof loginInfo.password !== 'string')
            return ws.createResponse(400).setEntity({
                errorMessage: 'Missing or invalid login information.'
            });

        // check if admin login
        if (loginInfo.username === 'admin') {

            // check if password matches
            if (loginInfo.password !== this.adminPassword)
                return ws.createResponse(400).setEntity({
                    errorMessage: 'Invalid login.'
                });

            // admin login successful
            return this.loginSuccessResponse({
                id: 0,
                email: 'admin'
            });
        }

        // customer login:

        // get database connection and lookup account record by email and password digest
        let dbConnection;
        return this.ds.getConnection(

        // execute account lookup DBO on the connection
        ).then(con => this.accountFetch.execute(dbConnection = con, null, {
            email: loginInfo.username,
            passwordDigest: crypto
                .createHash('sha1')
                .update(loginInfo.password, 'utf8')
                .digest('hex')

        // get matched account, if any, from the lookup result
        })).then(result => (
            result.records.length > 0 ? result.records[0] : null

        // build either login success or failure response
        )).then(account => (
            account ?
                this.loginSuccessResponse(account)
                : Promise.reject(ws.createResponse(400).setEntity({
                    errorMessage: 'Invalid login.'
                }))

        // release the database connection
        )).then(

            // success
            response => (this.ds.releaseConnection(dbConnection), response),

            // error
            err => (
                dbConnection ?
                    (this.ds.releaseConnection(dbConnection), Promise.reject(err))
                    : Promise.reject(err)
            )
        );
    }

    loginSuccessResponse(account) {

        // build and sign the JWT
        const now = Date.now() / 1000;
        const idToken = jws.sign({
            header: {
                alg: 'HS256'
            },
            payload:{
                iss: 'x2tutorial',
                aud: 'client',
                sub: account.email,
                iat: now,
                exp: now + 3600 // expire after an hour
            },
            secret: this.secret
        });

        // return successful login response
        return ws.createResponse(200).setEntity({
            sub: account.email,
            firstName: account.firstName,
            lastName: account.lastName,
            id_token: idToken
        });
    }
}

// export the handler class
module.exports = LoginHandler;
Naturally, there are some similarities in the handler's logic with our actors registry implementation.
Now we can add it to our server.js:
...

// assemble and run the web-service
ws.createApplication()

    ...

    // add login endpoint
    .addEndpoint(
        '/login',
        new (require('./lib/handlers/login.js'))(ds, dboFactory))

    ...
Now we can login! Send a POST with the following body to the /login endpoint:
{
  "username": "admin",
  "password": "DontTellAnybody"
}
The response you are going to get will look something like the following:
{
  "sub": "admin",
  "id_token": "eyJhbGciOiJIUzI1NiJ9.eyJpc3MiOiJ4MnR1dG9yaWFsIiwiYXVkIjoiY2xpZW50Iiwic3ViIjoiYWRtaW4iLCJpYXQiOjE1MDE5NDk0NDIuNzk2LCJleHAiOjE1MDE5NTMwNDIuNzk2fQ.1KI6e90pu3w6bGNPW_wUlFWoj0bCijBmDE1QnopgNQA"
}
Now, whenever we make a call to our API, we can add the Authorization HTTP header with the value of the id_token:
...
Authorization: Bearer eyJhbGciOiJIUzI1NiJ9.eyJpc3MiOiJ4MnR1dG9yaWFsIiwiYXVkIjoiY2xpZW50Iiwic3ViIjoiYWRtaW4iLCJpYXQiOjE1MDE5NDk0NDIuNzk2LCJleHAiOjE1MDE5NTMwNDIuNzk2fQ.1KI6e90pu3w6bGNPW_wUlFWoj0bCijBmDE1QnopgNQA
...
That's all, folks! Happy backending!